Articles > Installation Guides
Installing a doorbell is a relatively simple task that can be completed in a few easy steps. Here is a brief overview of the doorbell installation process:
1. Preparations: Before starting the installation, make sure to turn off the power supply to the existing doorbell. This can be done by flipping the corresponding breaker switch in your electrical panel. Additionally, gather all the necessary tools and materials such as a doorbell kit, screwdriver, drill, wires, wire connectors, and a voltage tester.
2. Remove the old doorbell: Start by removing the existing doorbell. Typically, it is attached to the wall with screws. Unscrew these screws and gently pull the doorbell away from the wall, exposing the wires connected to it. Use a voltage tester to ensure that the wires are not live.
3. Connect the wires: Attach the wires from the new doorbell unit to the corresponding wires in your home. Typically, one wire will be connected to the transformer and the other to the doorbell chime. Use wire connectors to securely join the wires together.
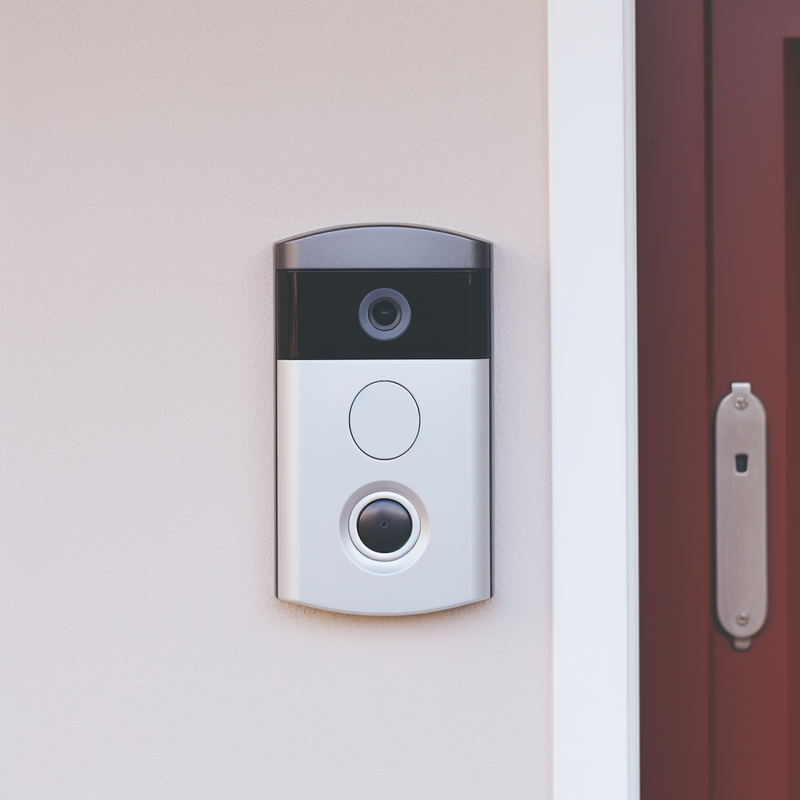
4. Mount the doorbell unit: Choose a suitable location to mount the doorbell unit, usually near the front door. Use a drill and screws to securely attach the unit to the wall.
5. Test the doorbell: Once the installation is complete, turn the power back on and test the doorbell to ensure it is functioning properly. Press the doorbell button to see if you can hear the chime.
Remember to always prioritize safety throughout the installation process. Turn off the power supply before working with any electrical components, and use protective gear when necessary.
The importance of following safety precautions cannot be overstated when working on electrical systems, particularly when working on an electrical box. Failure to adhere to safety measures can lead to serious accidents, injuries, or even fatal electrocution.
There are several potential risks involved when working on an electrical box. Firstly, the high voltage of electricity flowing through these boxes can be extremely dangerous, capable of causing severe burns, shocks, or even fires. Additionally, improper handling of electrical equipment can lead to short circuits, which may result in electric shocks or equipment damage.
To mitigate these risks, it is crucial to shut off the circuit breaker before starting any work on the electrical box. By doing so, the flow of electricity is cut off, minimizing the risk of electrical accidents. This action ensures the safety of the person working on the box, as well as protecting the electrical equipment from potential damage.
Remember, never attempt to work on an electrical box without shutting off the circuit breaker. Doing so will greatly reduce the chances of electrocution or other accidents. Always prioritize safety by wearing appropriate protective gear, such as insulated gloves and goggles, and following proper safety procedures. By following these safety precautions, you can ensure a safe working environment and prevent any potential hazards associated with working on an electrical box.
Before beginning the installation process, it is crucial to adequately prepare to ensure a smooth and successful installation. This involves several steps such as understanding the requirements, gathering the necessary tools and materials, and preparing the installation area. By following these steps, you can minimize potential obstacles and problems that may arise during the installation process.
Understanding the requirements is essential before starting the installation. This involves reviewing the installation instructions provided by the manufacturer or supplier. Pay close attention to any specific requirements, such as the type of surface or substrate required, the recommended temperature and humidity levels, or any other special considerations. By familiarizing yourself with these requirements, you can ensure that you have the necessary resources and knowledge to complete the installation properly.
Gathering the necessary tools and materials is another crucial step in preparing for installation. Make a checklist of all the tools and materials mentioned in the installation instructions and ensure that you have everything needed. This may include basic hand tools, such as measuring tape, level, utility knife, and a notched trowel, as well as specific tools or materials required for the particular installation, such as adhesives, underlayments, or fasteners. Gathering and organizing these items in advance will save time and prevent delays during the installation process.
Lastly, preparing the installation area is vital for a successful installation. This involves thoroughly cleaning and inspecting the area where the installation will take place. Remove any existing flooring or debris, and ensure that the surface is clean, smooth, and level. Check for any damages or irregularities that may need to be addressed before installation. Taking the time to properly prepare the installation area will help ensure a strong and durable installation and avoid potential problems in the future.
In conclusion, preparing for installation is a crucial step in ensuring a successful and smooth process. By understanding the requirements, gathering the necessary tools and materials, and preparing the installation area, you can minimize potential obstacles and ensure a strong and durable installation. Investing time and effort in preparation will ultimately save time and prevent issues that may arise during or after installation.
To successfully address the next heading, "Gather Necessary Tools and Materials," it is essential to have specific tools and materials at hand. Some of the key items required for this task include a screwdriver (both flathead and Phillips), a voltage tester, wire strippers, wire nuts, electrical tape, a drill with appropriate drill bits, a doorbell kit consisting of a bell push, chime box, transformer, and wiring, and anchors and screws if necessary.
A screwdriver is an essential tool as it helps in loosening or tightening screws during the installation process. Both flathead and Phillips screwdrivers are required as different types of screws may be used. The voltage tester is necessary to ensure that the electrical connections are functioning properly and to check for current flow.
Wire strippers are indispensable to remove the insulation from electrical wires without damaging the actual wires. Wire nuts are used to connect or join two or more wires together securely. Electrical tape serves as insulation and provides further protection to the electrical connections.
A drill equipped with the appropriate drill bits is crucial for creating holes, especially when mounting the doorbell kit. The doorbell kit itself is a vital component and includes a bell push, chime box, transformer, and wiring. Finally, anchors and screws may be needed to securely attach components to the desired location.
In summary, to gather the necessary tools and materials for addressing the next heading, ensure the availability of a screwdriver (flathead and Phillips), a voltage tester, wire strippers, wire nuts, electrical tape, a drill with suitable drill bits, a doorbell kit (bell push, chime box, transformer, and wiring), and anchors and screws if required. These tools and materials will facilitate a smooth and efficient completion of the task at hand.
To install a wired doorbell, you will need a few essential tools to make the process smooth and efficient. Here is a list of tools that you will need:
1. Screwdriver (Flathead and Phillips): These types of screwdrivers are essential for loosening and tightening screws during the installation process. The flathead screwdriver is used for screws with a straight slot, while the Phillips screwdriver is used for screws with a cross-shaped slot.
2. Voltage Tester: This tool is crucial for checking if the electrical power is turned off before starting the installation. It ensures your safety by confirming that the circuit is not live.
3. Wire Strippers: Wire strippers are used to remove the protective insulation from the wires. They make it easier to connect the wires and ensure proper electrical connections.
4. Drill: A drill equipped with the appropriate drill bits is necessary for creating holes in the wall or door frame to mount the doorbell components securely.
5. Doorbell Kit: The doorbell kit should include various components such as the bell push, chime box, transformer, and wiring. These components are necessary for creating a complete functional doorbell system.
Additional tools that may be required depending on the installation scenario include anchors and screws for mounting the doorbell components securely.
During the installation process, it is also recommended to have electrical tape on hand for securing and insulating the electrical connections.
By having these tools ready before starting the installation, you can ensure a smooth and successful wired doorbell installation.
Introduction:
Before attempting to install a doorbell system, it is important to gather all the necessary materials to ensure a smooth and successful installation process. This list of essential materials includes items such as a doorbell kit, transformer, drill, screwdriver, wire stripper, and electrical tape. By having these items readily available, you can efficiently complete the installation and enjoy the convenience of a fully functioning doorbell system.
Turning off the power before beginning the installation process for a hardwired doorbell system is of utmost importance. It ensures safety and prevents the risk of electrical shock.
When working with any electrical system, it is crucial to turn off the power at the circuit breaker. This simple yet crucial step can save lives by preventing accidents caused by electrical shock.
To turn off the power properly, you need to locate the circuit breaker that controls the power to the doorbell or doorbell transformer. The circuit breaker panel is usually located in the basement, utility room, or garage. Open the panel door to expose the circuit breakers, and search for the one that is labeled or indicated as the doorbell or the doorbell transformer. It may be identified as "doorbell," "buzzer," or "chime."
Once you have located the correct circuit breaker, switch it off. This will disconnect the power supply to the doorbell or doorbell transformer, ensuring that no electricity is flowing through the system. It is crucial to double-check that the power is indeed turned off before proceeding with the installation. You can use a non-contact voltage tester to confirm that there is no electrical current present.
In conclusion, turning off the power before starting the installation process for a hardwired doorbell system is essential. It ensures personal safety and eliminates the risk of electrical shock.
Turning off power at the circuit breaker is of utmost importance before starting any installation. This crucial step ensures the safety of the person performing the installation and prevents the risk of electric shock.
When the power is shut off at the breaker box, it cuts off the electricity supply to the specific area or device where the installation is taking place. This eliminates the possibility of any electrical current flowing through the components, making it safe for the installer to work without the risk of getting shocked.
Not turning off the power can have severe consequences. Firstly, it puts the person performing the installation at risk of electric shock. This can result in serious injury or even prove fatal in some cases. In addition, failure to turn off the power can damage the doorbell components being installed. The sudden flow of electricity can cause a surge, potentially burning or even melting the delicate parts.
Moreover, not shutting off the power can lead to an electrical short circuit. This occurs when there is an unintended connection between two conductive elements, causing a sudden surge of electricity. Short circuits can damage the wiring and other electrical components, leading to costly repairs or even house fires.
In conclusion, turning off the power at the circuit breaker before starting any installation is crucial for ensuring the safety of the installer and preventing any potential damage or accidents. It is a simple yet essential step that should never be overlooked.
Introduction:
Removing an old doorbell can be a simple yet necessary task when upgrading your home's entryway or replacing a malfunctioning device. Whether it's a wired or wireless doorbell, the process typically involves a few basic steps to ensure a safe and efficient removal. In this guide, we will walk you through the process, providing clear instructions on how to remove your old doorbell without causing any damage to your walls or wiring. By following these steps, you will be able to successfully remove the old doorbell and prepare the space for a new device, allowing for a seamless transition to a modern and functional doorbell system.
To locate and remove the old doorbell button, follow these steps:
1. Identify the doorbell button on the exterior of the house: Typically, the doorbell button is located near the front door or by the main entrance. It is usually a small button-like object, often made of plastic or metal, and may be labeled as "doorbell."
2. If there is a covering plate, remove it: Some doorbell buttons have a covering plate over them for protection. To remove the covering plate, gently pry it open using a flathead screwdriver or your fingers. Be careful not to damage the plate or surrounding area.
3. Unscrew the button from the wall: Once the covering plate is removed, you will see the button attached to the wall. Use a Phillips screwdriver to unscrew the screws securing the button to the wall. Make sure to keep the screws in a safe place to prevent losing them.
4. Gently pull out the button to expose the wiring: After unscrewing the button, be careful not to pull it too forcefully. Gently pull the button away from the wall just enough to expose the wiring behind it. Avoid tugging on the wires, as they may be fragile or connected to a transformer.
With these steps, you can successfully locate and remove the old doorbell button. Remember to disconnect the power supply before handling any electrical components, and exercise caution to avoid any personal harm or damage during the process.
Introduction:
When it comes to removing old buttons without causing any damage to your walls, it is important to follow a careful and systematic approach. By taking the right steps, you can safely remove the button without leaving behind any unsightly marks or causing any harm to your walls. In this article, we will outline a step-by-step guide on how to remove old buttons without damaging your walls, ensuring a smooth and hassle-free process. So, let's dive in and learn the proper techniques to accomplish this task effectively and efficiently.
To disconnect the wires from the transformer, follow these steps:
1. Ensure safety: Prior to performing any electrical work, it is crucial to switch off the power supply to the transformer. Locate the breaker for the transformer in the electrical panel and flip it to the "off" position. Use a voltage tester to verify that the power has been disconnected.
2. Unscrew wire caps: Locate the wire caps or connectors that are securing the wires from the home's electrical system to the transformer. Using a screwdriver or pliers, carefully unscrew or unfasten these caps to release the wires. Take note of which wires are connected together for proper reconnection later.
3. Remove the transformer: Once the wires have been disconnected, the transformer can be removed from its position in the electrical junction box. The box is typically secured with bolts or screws. Use the appropriate tools to loosen and remove these fasteners. Gently pull the transformer out of the box, being cautious not to damage any of the other electrical components.
4. Tape power supply wires: To ensure that the power supply wires stay in place and do not come into contact with other electrical components, use electrical tape to securely fasten them down. Wrap the tape tightly around the wires, ensuring that there are no loose ends or exposed sections.
By following these steps, you can safely and effectively disconnect the wires from the transformer without causing any damage or harm.
To identify and disconnect wires safely, it is crucial to prioritize safety at all times. Before attempting any wire work, it is essential to cut off the power supply to the area you'll be working in. This can be done by locating the main breaker box in your home and switching it to the "off" position.
To begin identifying the wires behind a doorbell, you will first need to remove the doorbell cover or housing. This can typically be achieved by unscrewing the cover or gently prying it off with a flathead screwdriver. Once the cover is off, you will be able to see the wires connected to the doorbell mechanism.
To correctly identify the wires, take note of their colors and labels. Most commonly, doorbell wires are labeled as "front" and "transformer." The "front" wire is usually connected to the button at the front of your house, while the "transformer" wire connects to the power source.
After correctly identifying the wires, it is time to disconnect them. Using wire cutters or wire strippers, carefully sever the connection between the wires and the doorbell mechanism. Ensure that no exposed wiring is left behind to minimize the risk of accidental contact or short-circuits.
By following these steps, you can safely identify and disconnect wires behind a doorbell. Remember, always prioritize safety by cutting off the power at the main breaker box before attempting any work with wires.
Installing a new doorbell kit can be a simple yet effective way to enhance the functionality and convenience of your home's entrance. Whether you are replacing an outdated doorbell or installing one for the first time, this guide will walk you through the step-by-step process. From gathering the necessary tools to understanding the wiring and installation process, these instructions will provide you with all the information you need to successfully install your new doorbell kit. So, let's dive in and explore how you can easily upgrade your home's entrance with a new doorbell kit.
Mounting the Transformer for Doorbell Installation
A transformer is an essential component of a doorbell system. Its purpose is to lower the voltage from the standard household voltage to the appropriate level for the chimes and doorbell to operate safely. Mounting the transformer correctly is crucial for the doorbell installation to function efficiently. Here are the steps to mount the transformer:
1. Choose a suitable location: Find a convenient spot near the electrical panel where you can mount the transformer. Ensure that it is easily accessible for future maintenance or troubleshooting.
2. Turn off the power: Before working with electrical systems, always turn off the power at the circuit breaker to avoid any accidents or shocks.
3. Mark the mounting holes: Hold the transformer against the wall or surface and mark the location of the mounting holes using a pencil or marker.
4. Drill the holes: Using an appropriate-sized drill bit, carefully drill holes at the marked spots. Be cautious not to penetrate any electrical wires or plumbing behind the wall.
5. Mount the transformer: Securely attach the transformer to the wall using appropriate screws or anchors. Make sure it is level and stable.
6. Connect the wires: Strip the insulation from the wires coming from the doorbell system and insert them into the corresponding input terminals on the transformer. Ensure a secure connection by using twist wire connectors or another approved method.
7. Test the system: Once the transformer is mounted and the wires are connected, restore the power at the circuit breaker. Test the doorbell system to verify its functionality.
By following these steps, you can successfully mount the transformer for your doorbell installation. Taking care to lower the voltage and connect the wires securely using twist wire connectors will help ensure a reliable and safe doorbell system.
 Author: VR2ual Artist