Articles > Troubleshooting and Maintenance
Introduction:
When purchasing a house, it is crucial to consider the costs of repair and upkeep. Ignoring this aspect can lead to significant financial burdens down the line. Planning ahead for home maintenance is essential to avoid unexpected repair bills and ensure the longevity of the property. Regular maintenance plays a vital role in preventing expensive replacements or repairs that could otherwise arise.
Understanding the repair and upkeep costs is essential in making an informed decision about purchasing a house. The costs associated with maintenance must be factored into the overall budget, as neglecting this aspect can lead to financial strain in the future. From routine upkeep to major repairs, every aspect of the property's ongoing maintenance should be evaluated.
Planning ahead for home maintenance allows homeowners to allocate funds for future repairs. By setting aside money specifically for this purpose, individuals can avoid the stress and financial strain that can occur when unexpected repair bills arise. Proactive planning enables homeowners to address repairs in a timely manner, preventing potential further damage that can result from neglect.
Regular maintenance is crucial in preventing expensive replacements or repairs. Simple tasks like regular cleaning, inspecting and repairing minor issues, and maintaining systems such as plumbing, electrical, and HVAC can help identify problems early on. By addressing these problems promptly, homeowners can avoid costly and extensive repairs that could have been prevented with regular maintenance.
In conclusion, considering the costs of repair and upkeep, planning ahead for home maintenance, and prioritizing regular upkeep are essential aspects of owning a house. By taking these factors into account, homeowners can mitigate unexpected repair bills, establish a sustainable maintenance plan, and prevent expensive replacements or repairs in the long term.
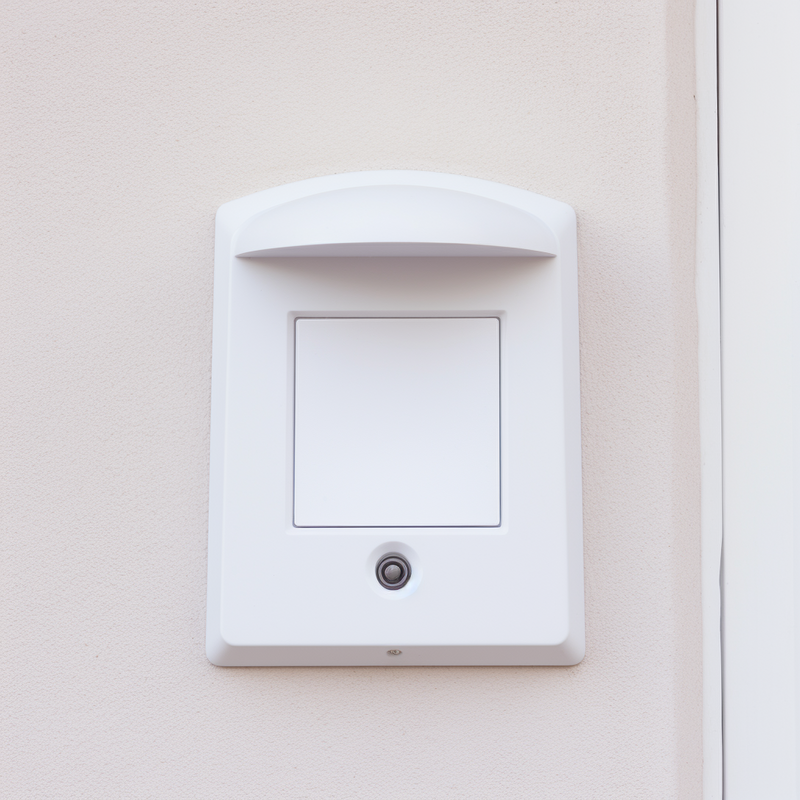
Regular maintenance is crucial for doorbells to ensure their proper functioning and avoid potential consequences that may arise from neglecting such maintenance tasks. Neglecting maintenance can lead to various issues that may hinder the functionality of the doorbell and compromise the security of the premises.
One of the key reasons for regular maintenance is to prevent bug-related triggers. Doorbells are often equipped with motion detection capabilities to alert homeowners of any activity around their premises. However, if the lens and its surrounding area are not properly cleaned, it can attract insects and bugs. These bugs may trigger false alarms, resulting in unnecessary notifications or even a malfunctioning doorbell system. Regular maintenance, such as cleaning the lens and surrounding area, helps prevent bug-related triggers and ensures accurate motion detection.
Moreover, neglecting maintenance can also lead to the accumulation of dirt, dust, and debris on the doorbell, which can hinder its overall performance. Over time, this accumulation may result in reduced audio clarity and distorted video quality. Regular cleaning of the doorbell's components can help maintain optimal audio and video capabilities, ensuring clear communication and accurate recording.
In conclusion, regular maintenance for doorbells is of utmost importance. Neglecting maintenance tasks can lead to issues such as bug-related triggers and compromised functionality. Cleaning the lens and surrounding area to prevent insect interference and ensuring accurate motion detection are necessary maintenance tasks to keep a doorbell system in top-notch condition. Taking the time to perform regular maintenance can prevent potential problems and maintain the efficiency and reliability of the doorbell system.
Proper maintenance is crucial to ensure the long-term functionality and efficiency of various systems and objects. Neglecting maintenance can lead to a multitude of issues that can cause inconvenience, safety hazards, and costly repairs. From household appliances to vehicles, infrastructure to industrial equipment, there are common problems that can arise without regular and proper maintenance. This overview will highlight some of these issues and emphasize the importance of implementing timely maintenance measures to prevent them. By understanding the potential consequences of neglecting maintenance, individuals and organizations can proactively address these problems and save both time and money in the long run.
To check the power source in your home, you can follow these steps:
1. Begin by visually inspecting all the outlets in your home. Look for any signs of damage, such as cracks, discoloration, or burning marks. Ensure that the outlet covers are intact and securely in place.
2. Next, plug in a small electrical device, such as a lamp or a phone charger, into each outlet to ensure they are functioning properly. If the device doesn't turn on, it indicates that there may be an issue with the power source or the outlet itself.
3. If you come across any non-functioning outlets, try resetting the circuit breaker or replacing the blown fuse associated with that particular circuit. If this doesn't solve the problem, it is advisable to contact a qualified electrician to inspect and repair the issue.
In addition to checking the power source, it is important to have Ground Fault Circuit Interrupter (GFCI) receptacles installed near plumbing fixtures. GFCI receptacles are designed to protect against electrical shock by quickly shutting off power if there is a fault in the circuit. This is crucial near water sources to prevent any potential electrocution incidents.
Furthermore, the absence of GFCI receptacles may affect the home inspection during the sale of the house. Inspectors often check for the presence and functionality of GFCI receptacles in bathrooms, kitchens, garages, and outdoor areas. Their absence can raise safety concerns and may need to be addressed before the sale can proceed.
To ensure that the doorbell is properly connected to a power source, follow these steps:
1. Check the power supply: Begin by verifying that the power supply is turned on. This may involve locating the circuit breaker or fuse box responsible for providing electricity to the doorbell system. Ensure that the power supply is functioning correctly.
2. Inspect the doorbell wiring: Examine the wiring leading from the power source to the doorbell. Look for any loose or disconnected wires that may be causing the doorbell to not receive power. Additionally, check for any signs of damage, such as frayed or exposed wires, which can also impede the flow of electricity.
3. Check the connections: Ensure that the wiring is securely connected to both the power supply and the doorbell unit. Tighten any loose connections and make sure all terminals are properly fitted.
4. Test the doorbell: After confirming that the power supply is on, the wiring is intact, and the connections are secure, test the doorbell to ensure it is receiving power and functioning correctly. Press the doorbell button and listen for the sound or check for any visual indicators, such as a light turning on. If the doorbell does not respond, recheck the previous steps to identify any potential issues.
By following these steps, you can ensure that the doorbell is properly connected to a power source and functioning as intended.
Introduction: Testing the voltage of a circuit is crucial to ensure that it falls within the correct range. This step is vital in maintaining the safety, efficiency, and proper functioning of electrical systems. By testing the voltage, professionals can identify any potential issues, determine if the voltage is within the specified limits, and take necessary actions to rectify any deviations. In this article, we will explore the importance of testing voltage and the methods used to ensure that it remains within the correct range. Whether you are an electrician, engineer, or simply a curious individual interested in understanding the basics of electrical systems, this information will provide you with valuable insights into voltage testing.
When it comes to electrical systems, ensuring safety is of utmost importance. Inspecting the wiring is a crucial step in this process as it helps identify any damages or signs of wear and tear that could potentially lead to electrical hazards.
To begin with, visually examining the wiring is the first step of the inspection process. This involves carefully inspecting the wiring for any damages such as frayed or exposed wires, loose connections, or burnt marks. These visible signs could indicate potential problems in the electrical system.
The next step is to check for signs of wear and tear. Over time, wiring can become worn out due to factors like age, rodents, or environmental conditions. It is important to look for signs such as discolored insulation, brittle wires, or corroded connections. These signs not only compromise the efficiency of the electrical system but also pose safety risks.
During the inspection, it is vital to pay attention to key areas like junction boxes, outlets, and circuit breakers as these are common places for wiring issues to occur. Additionally, ensuring that proper safety measures are in place, such as using appropriate tools and protective gear, is crucial to prevent accidents during the inspection process.
In conclusion, inspecting the wiring is an essential process to ensure the safety of electrical systems. By visually examining the wiring for damages and signs of wear and tear, potential hazards can be identified and addressed promptly, preventing accidents and maintaining the efficiency of the electrical system.
Checking for any loose or frayed wires is of utmost importance when it comes to electrical safety in the home. These wires can pose serious risks such as electrical shocks, short circuits, and even fires. Therefore, it is essential to regularly inspect all electrical outlets, appliances, and wiring in your home.
Loose or frayed wires are hazardous as they can lead to electrical sparks, which may ignite nearby flammable materials or cause electrical appliances to malfunction. By addressing these issues promptly, you can prevent potential accidents and protect the safety of yourself and your family.
To check for loose or frayed wires, start by visually inspecting all electrical cords, plugs, and outlets. Look for any signs of wear and tear, such as exposed wires, damaged insulation, or loose connections. Pay close attention to areas where wires may be bent or pinched, as this can cause them to fray over time. Additionally, use your hands to gently wiggle and check the tightness of all electrical plugs to ensure they are securely attached.
If you discover any loose or frayed wires, it is important to address them immediately. In minor cases, you may be able to fix the issue by tightening loose connections or using electrical tape to secure frayed wires. However, for more serious cases, it is crucial to seek professional help from a qualified electrician. They have the knowledge and expertise to accurately assess the problem and provide appropriate solutions while ensuring your safety.
In conclusion, checking for any loose or frayed wires is an essential step in maintaining electrical safety in the home. Regular inspections and prompt addressing of any issues can greatly reduce the risk of electrical hazards, protecting both your property and the well-being of your loved ones.
Introduction:
Electrical wiring plays a crucial role in carrying electricity safely throughout our homes and buildings. However, wear and tear, accidents, or aging can result in damaged wiring, which poses various hazards. To prevent electrical issues and ensure a safe electrical system, it is imperative to promptly replace any damaged wiring. By doing so, we can mitigate the risks associated with faulty wiring, such as electrical shocks, short circuits, fires, and damage to electronic devices. This article will provide a step-by-step guide on identifying damaged wiring, understanding its consequences, and undertaking the necessary actions to replace it with new, reliable wiring. Following these guidelines will help individuals maintain the integrity of their electrical systems, safeguard their homes or offices, and ensure the well-being of their loved ones and themselves.
Regular cleaning of the doorbell button is essential to maintain its functionality. Over time, dust, dirt, and grime can accumulate, hindering the button's responsiveness. By following a few simple steps, you can ensure that your doorbell button remains in optimal working condition.
First, turn off the power to the doorbell system. This precautionary measure will prevent any accidental ringing while you clean the button. Locate the power switch or circuit breaker associated with the doorbell system and switch it off.
Next, remove the button cover by gently prying it off. Use a small screwdriver or your fingers, depending on the type of cover. Be cautious and gentle to avoid any damage.
Once the cover is removed, prepare a mild detergent solution by mixing a small amount of detergent with warm water. Dampen a soft cloth or sponge in the solution and gently wipe the surface of the button. Pay careful attention to removing any dirt or grime that may have accumulated.
Avoid using harsh cleaning agents, as they can potentially damage the button's materials. Stick to mild detergents or soap specifically designed for cleaning delicate surfaces.
After cleaning, ensure the button is thoroughly dry before reassembling the cover. Dampness can cause issues and hinder the button's functionality, so take your time to allow the button to air dry completely.
Following these simple steps will help maintain the functionality of your doorbell button, ensuring it remains clean and responsive. Remember to regularly clean the button to prevent the buildup of dirt and grime, ensuring your doorbell is always ready to alert you of visitors.
To ensure the proper functioning of a button, it is of utmost importance to regularly remove any dirt and debris that may accumulate on its surface. The accumulation of dirt and debris on the button can hinder its ability to respond effectively, leading to potential malfunctions and false alarms.
Dirt and debris can easily find their way onto the surface of a button, especially if it is located in an exposed or high-traffic area. Whether it is dust, lint, or other particles, these contaminants can gradually build up and interfere with the button's mechanism. As a result, the button may become unresponsive or require excessive force to activate.
Regularly cleaning the button on a security system is vital to prevent malfunctions and false alarms. By removing dirt and debris, the button can maintain its sensitivity and responsiveness. It is recommended to use a soft cloth or a cotton swab slightly dampened with a mild cleaning solution to gently wipe the button's surface. Care should be taken to avoid using abrasive materials or excessive moisture, as they may damage the button or its surrounding components.
In conclusion, cleaning the button on a security system regularly is crucial for ensuring its proper functioning. By removing dirt and debris, the button remains responsive and prevents malfunctions and false alarms. Establishing a routine cleaning schedule will help maintain the button's functionality and ensure the security system operates effectively.
Introduction:
Cleaning around and inside buttons may seem like a small task, but it is an important aspect of maintaining the functionality and appearance of various objects, such as electronic devices, appliances, and clothing. Using a small brush or cloth to remove dirt, dust, or debris from the buttons can help prevent their deterioration, improve their responsiveness, and enhance their overall longevity. Whether it's the buttons on your television remote, washing machine, or favorite piece of clothing, taking the time to clean them properly can make a noticeable difference in their performance and visual appeal. In this guide, we will explore the various steps and techniques to effectively clean around and inside buttons using a small brush or cloth, ensuring that these tiny yet significant components remain in optimal condition.
To test the chime feature of the security system, follow these steps:
1. Put the security system components in "test mode": Contact the maintenance provider or security system company to assist you in putting the system in test mode. They will guide you through the process and provide the necessary instructions.
2. Ready the components: Make sure the security system components, such as control panel, sensors, and alarms, are properly set up and functional. Ensure that the chime feature is enabled and configured correctly.
3. Trigger the chime: Depending on your security system, there are different ways to trigger the chime. Most systems offer an option on the control panel or a remote keypad to activate the chime function. Press the designated button or enter the appropriate code to activate the chime mode.
4. Observe functionality: Once the chime is triggered, listen for the sound coming from the speakers or alarms connected to the system. The chime should be audible and distinct, indicating its proper functionality. If there are no chime sounds or if the sound is distorted, contact the maintenance provider for further assistance.
5. Repeat the test: To ensure consistency, perform the chime test multiple times at different locations within the premises, especially near entry points. This will help identify any dead zones or weak chime signal areas that may need adjustments.
Remember, it is crucial to involve the maintenance provider or security system company when testing the chime feature of the security system, as they have the expertise to guide you through the process and address any issues that may arise.
To test if the chime of the doorbell sounds correctly, follow these simple steps. Firstly, locate the doorbell button; it is usually placed either on the door frame or next to it on the wall. Once you have located the button, gently press it with your finger.
As you press the button, listen attentively for the sound that should be emitted by the doorbell chime. The chime can vary depending on the model, but it is typically a pleasant and audible sound. If you hear the sound of the chime, congratulations! The doorbell is functioning properly, and you can be assured that it will alert you when someone is at your door.
However, in the unfortunate event that you do not hear any chime after pressing the button, further action is required. Start by checking if the doorbell is securely mounted – ensure that it is tightly attached to either the door frame or wall. If the doorbell is loose, it may be necessary to repair or reposition it to ensure proper functionality.
If the doorbell remains unresponsive even after it has been secured properly, it may be necessary to troubleshoot or seek professional assistance. This could involve checking the wiring connections or seeking the help of an electrician specialized in doorbell repairs.
By following these steps, you can effectively test if the doorbell chime sounds correctly and take the necessary actions to ensure a functioning doorbell system.
If you are experiencing any issues with your doorbell, you can troubleshoot the problem by following these steps.
1. Ensure that the doorbell is actually working by pressing the button and listening for any sound. If there is no sound, it is likely that the doorbell needs to be replaced.
2. Inspect the connections and wires to see if there is any damage or loose connections. Sometimes, wires can become frayed or disconnected, which can cause the doorbell to stop functioning properly. If you notice any damage or loose connections, you will need to address them.
3. If necessary, replace any faulty parts. The most common parts that may need to be replaced are the transformer or chime. The transformer is responsible for providing power to the doorbell, so if it is faulty, the doorbell will not work. The chime is the component that actually produces the sound when the doorbell is pressed, so a faulty chime will also result in a non-functional doorbell.
4. Finally, test the doorbell after making any necessary repairs or replacements. Press the button and listen for the sound. If the doorbell is now working properly, the troubleshooting process is complete.
By following these steps and checking the connections and replacing parts as needed, you should be able to resolve any issues with your doorbell and restore it to full functionality.
 Author: VR2ual Artist