Articles > Troubleshooting and Maintenance
Introduction:
The purpose of the Introduction is to provide an overview and background of the topic being discussed. It sets the tone for the rest of the document and highlights the main topics that will be covered. In the context of the overall subject, the Introduction serves as a starting point and helps the reader understand the significance and relevance of the information presented.
The main topics covered in the Introduction typically include a brief history or background of the subject, an explanation of its importance or relevance, and an outline of the key themes or arguments that will be explored in the subsequent sections. It may also introduce any key terms or concepts that are necessary for understanding the rest of the document.
The significance of the Introduction lies in its ability to engage the reader and provide them with necessary context and information. It sets the stage for the rest of the document and helps to establish the overall purpose and objectives. Without a proper Introduction, the reader may struggle to grasp the importance and relevance of the subject matter and may not fully understand the subsequent sections.
In conclusion, the Introduction plays a crucial role in any document by providing an overview of the topic, highlighting the main topics to be covered, and establishing the significance and relevance of the overall subject. It is a vital component in capturing the reader's attention and ensuring they have the necessary background and context to understand the rest of the document.
Doorbell issues are common problems that homeowners often face. These problems can range from a malfunctioning doorbell button to a faulty wiring system. In this brief overview, we will highlight some of the most common doorbell issues and provide a summary of each problem.
One common problem is a non-functional doorbell button. This occurs when the doorbell button fails to initiate the sound or chime when pressed. The possible causes for this issue can be a loose or broken wire connection, a worn-out button, or a faulty doorbell transformer.
Another common issue is a doorbell that continuously rings or buzzes. This can be quite annoying and disruptive. The main cause of this problem is a stuck doorbell button. When the button gets stuck, it keeps the circuit closed, resulting in the continuous ringing or buzzing sound. Other potential causes include a shorted wire or a malfunctioning transformer.
A no sound doorbell is another frequent problem. In this case, when the doorbell button is pressed, no sound or chime is produced. The causes can be a faulty doorbell button, a damaged transformer, or a wiring issue.
Lastly, intermittent doorbell operation is also a common issue. This occurs when the doorbell works randomly or sporadically. The main culprits behind this problem are loose wire connections or a faulty transformer.
To troubleshoot these doorbell issues, homeowners can try solutions such as checking and tightening loose connections, replacing worn-out buttons, inspecting and replacing damaged transformers, and ensuring proper wiring connections.
In summary, common doorbell issues include non-functional doorbell buttons, continuously ringing or buzzing doorbells, no sound doorbells, and intermittent doorbell operation. By understanding these problems and implementing the appropriate solutions, homeowners can effectively address these issues and restore the functionality of their doorbells.
Introduction:
A functioning doorbell is a small yet essential part of any home or building. It serves as a convenient method for visitors to announce their arrival, ensuring that we are aware of their presence at the door. However, like any other mechanical device, doorbells can encounter problems over time. From a small glitch in the wiring to a faulty button or chime, each problem has the potential to disrupt our daily routines and compromise the security of our homes. Therefore, it is crucial to address doorbell issues promptly to maintain a safe and efficient living environment.
Troubleshooting Steps for Addressing Doorbell Issues
If your doorbell is not functioning properly, following these troubleshooting steps can help you identify and resolve the issues without shutting off the main electric supply.
1. Check the Doorbell Button:
Start by examining the doorbell button. Look for loose connections or signs of damage. Tighten any loose screws and ensure that the wires are securely connected. If necessary, clean the button and test if the doorbell now works.
2. Inspect the Wiring:
Next, inspect the wiring connecting the doorbell button to the transformer. Check for any loose or damaged wires and repair or replace them if needed. Ensure all connections are secure and tighten any screws or clamps.
3. Test the Doorbell Transformer:
To test the doorbell transformer, switch off the power at the main electrical panel. Use a screwdriver or needle-nose pliers to remove the cover plate of the doorbell transformer. Check for any signs of overheating, burnt wires, or loose connections. If any issues are found, repair or replace the transformer accordingly.
4. Verify the Doorbell Chime:
If the doorbell still doesn't work, check the doorbell chime. Open the chime cover and examine the wiring connections. Make sure they are secure and fix any loose wires. If the chime seems broken, consider replacing it.
5. Test the Doorbell System:
After completing the above steps, turn on the power and test your doorbell. If it still doesn't work, contact a professional electrician as there may be a more complex issue that requires expert assistance.
Remember, troubleshooting your doorbell can be done without shutting off the main electric supply, except when testing the doorbell transformer. By following these steps and using tools like screwdrivers, clamps, and needle-nose pliers as necessary, you can accurately diagnose and resolve common doorbell issues efficiently.
To identify the root cause of a problem with a doorbell, follow these steps to thoroughly inspect the button, chime, transformer, and wiring:
1. Begin by inspecting the button. Check for any loose screws or damaged wires. Ensure that the button is securely attached to the doorframe or wall. If there are any noticeable issues, tighten the screws or replace any damaged wires.
2. If the button appears to be in good condition, move on to inspecting the chime. Start by removing the cover of the chime box. Examine the wiring connections inside to ensure they are secure and not frayed or damaged. Look for any signs of burned or melted wires. If there are any loose or damaged wires, make the necessary repairs or replacements.
3. If the button and chime are not the source of the problem, inspect the transformer. Locate the transformer, usually installed near the electrical panel or close to the chime box. Check for loose or damaged wires connected to the transformer. Use a multimeter to test the voltage output of the transformer. If the output is below the recommended range, the transformer may need to be replaced.
4. Lastly, if the issue persists, thoroughly inspect the wiring. Start by following the wires from the button to the chime and the transformer. Look for any signs of damage, such as exposed wires or fraying. Repair or replace any damaged sections of wiring.
By following these steps and thoroughly inspecting the button, chime, transformer, and wiring, you can identify the root cause of the problem with your doorbell.
One of the first steps to check for power supply issues is to investigate the voltage of the transformer using a voltmeter. This is an essential task as it helps determine if the voltage matches the marked voltage. To perform this step, you will need a voltmeter, which can be easily purchased at hardware stores.
First, locate the transformer, which is usually found near the electrical panel or within a junction box. Switch off the power supply to the doorbell circuit before proceeding. Carefully remove the cover of the transformer to expose the wiring. Set your voltmeter to measure AC voltage and attach the probes to the transformer's terminals. Read and record the voltage value displayed on the voltmeter.
If the measured voltage does not match the marked voltage, it is likely that the transformer is faulty. In this case, it will need to be replaced. It is recommended to consult a professional electrician for this task to ensure proper installation and safety.
Once the transformer issue is resolved, the next step is to inspect the doorbell circuit's wiring for any signs of water exposure, rodent damage, or dry rot. These issues can disrupt the power supply to the doorbell, resulting in malfunctions. Examine the wiring carefully, looking for any breakages or signs of damage. If any sections of wire are found to be broken, they should be replaced promptly.
By following these steps, you can thoroughly check for power supply issues, identify faulty transformers, and address any wiring problems in the doorbell circuit. This will help ensure the doorbell operates smoothly and reliably.
Introduction: Investigating Possible Wiring Problems
Electrical wiring is a crucial component of any residential or commercial building, providing the essential infrastructure for power distribution. However, wiring problems can pose significant risks, including power outages, electrical fires, or even fatal electric shocks. To ensure the safety and functionality of electrical systems, it is essential to investigate and address any potential wiring problems promptly. This article will explore some common signs and symptoms of wiring issues, the importance of professional inspections, and the steps homeowners or business owners can take to identify and resolve such problems. By understanding the indicators of wiring problems and employing proper investigation techniques, individuals can maintain a safe and reliable electrical system in their properties.
It is important to regularly check the doorbell transformer to ensure that it is functioning properly. Here are the steps to be followed in order to check the doorbell transformer:
1. Turn off the power: Before starting the inspection, it is essential to turn off the power to the electrical panel. This can be done by accessing the grid switch and flipping it to the off position. This precautionary measure ensures your safety and prevents any accidents.
2. Access the transformer: Once the power is turned off, locate the electrical panel where the transformer is housed. Open the panel and identify the transformer. It is usually a small box-like device mounted on the panel. Take caution while handling it as it may still hold electrical charges.
3. Check the cables: Examine the incoming and output cables connected to the transformer. Make sure they are securely attached and free from any physical damage. Look out for loose connections, frayed wires, or signs of overheating. If any issues are found, contact a professional electrician to repair or replace the cables.
4. Use a tester: Test the voltage using a compatible electrical tester. Carefully probe the incoming cables to check if the transformer is receiving power. Then, test the output cables to ensure that the correct voltage is being supplied to the doorbell system. Follow the instructions provided with the tester for accurate readings.
5. Seek professional help: It is crucial to emphasize that checking the doorbell transformer should ideally be done by a qualified specialist. They have the knowledge and expertise to handle electrical components safely and accurately diagnose any problems that may be present. If any abnormalities are encountered during the process, it is recommended to consult a professional to resolve them.
In conclusion, regularly inspecting the doorbell transformer is essential to ensure proper functioning of the doorbell system. By following these steps, you can identify any potential issues and promptly seek professional assistance to address them.
To locate the doorbell transformer in your home, follow these steps. First, check the common locations where the transformer is typically found. These include near the electrical panel, garage, attic, utility closet, or under the exterior paneling by the front door. Start by inspecting these areas to see if the transformer is visible.
If you are unable to locate the transformer in these common areas, try tracing the doorbell wires. This can be done by following the wires from the doorbell button to see where they lead. Look for any junction boxes or other devices along the way that could house the transformer.
Begin by identifying the doorbell button, usually located near the front door. Next, examine the wiring leading from the doorbell button to the inside of the house. This wiring often runs through the walls or ceilings and may pass through the electrical panel or utility areas.
Carefully follow the wires to find any boxes or devices that could conceal the transformer. In older homes, the transformer may be mounted on a junction box or directly on the electrical panel. In newer homes, it is often located in the attic or utility closet.
By systematically checking the common locations and tracing the doorbell wires, you should be able to locate the doorbell transformer in your home.
Testing the voltage of a doorbell unit is a simple process that can be done using a multimeter. Here's a step-by-step guide on how to test the voltage with a multimeter:
1. Start by ensuring that the doorbell unit is properly installed and functioning. Ensure that the power source is connected and turned on.
2. Set the multimeter to the appropriate AC voltage range. In this case, since we are testing the voltage of a doorbell unit, it is important to set the multimeter to the AC voltage range rather than the DC voltage range. Look for the AC voltage symbol on the multimeter dial.
3. Take the test leads and connect them to the appropriate ports on the multimeter. The black test lead should be connected to the COM (common) port, while the red test lead should be connected to the VΩmA (voltage, ohms, milliamps) port.
4. With the multimeter turned on and set to the AC voltage range, carefully touch one test lead to each post or terminal of the doorbell unit. Make sure the test leads have good contact with the metal parts of the posts.
5. Look at the voltmeter display on the multimeter. It should indicate the voltage reading of the doorbell unit. If the voltmeter reads the correct input voltage, then the doorbell unit is receiving the appropriate power.
By following these steps and using the appropriate settings and test leads, you can easily test the voltage of a doorbell unit using a multimeter. Remember to be cautious and follow safety guidelines when working with electrical appliances.
Introduction:
A transformer is an electrical device that is responsible for transferring electrical energy between different circuits. It plays a crucial role in stepping up or stepping down voltage levels, making it an essential component in power distribution networks. However, transformers can experience various issues over time due to factors such as aging, overload, or manufacturing defects. When a transformer becomes faulty or malfunctions, it is imperative to determine whether it needs replacement. In this section, we will explore the signs and indications that suggest the need to replace a transformer, as well as the processes involved in replacing this vital electrical device.
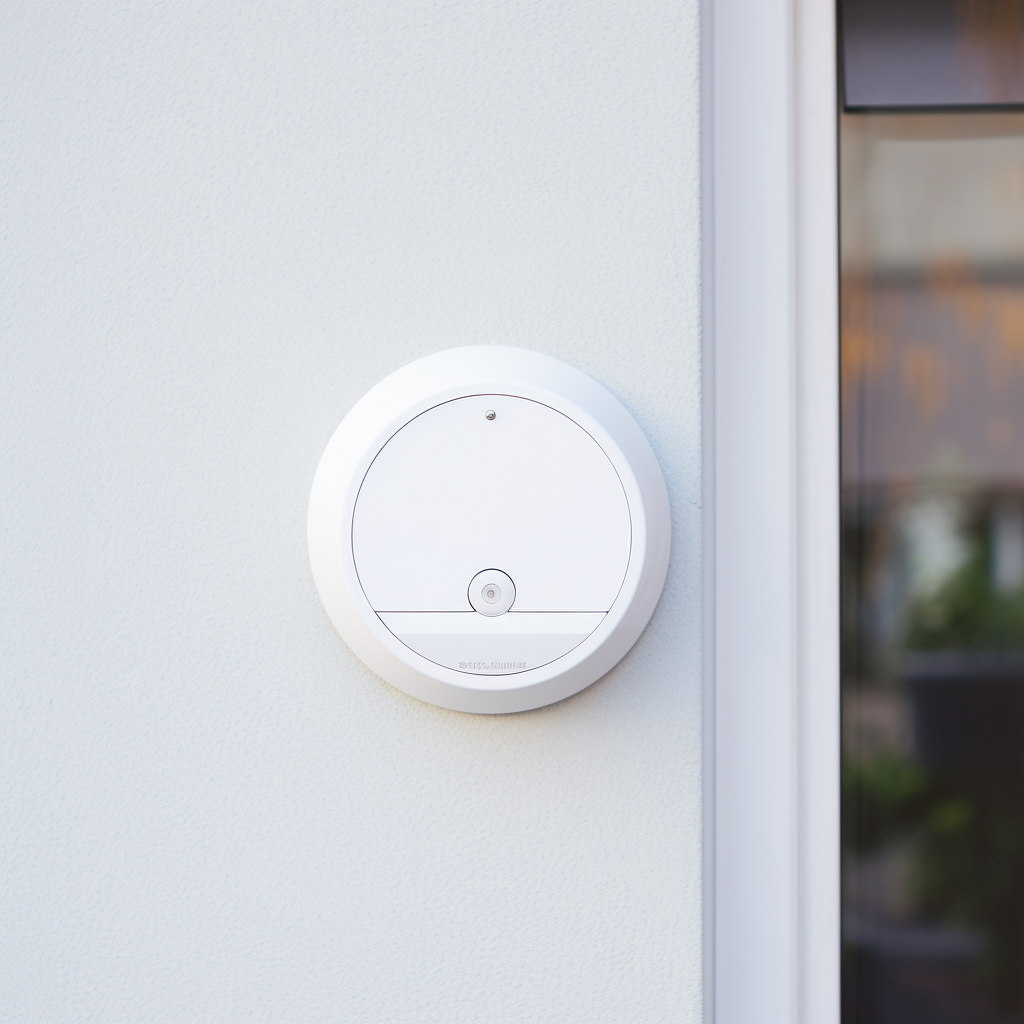
Inspecting Wired Connections for Issues with the Ring Doorbell
When it comes to troubleshooting your Ring doorbell, it's crucial to inspect the wired connections thoroughly. Follow these simple steps to ensure that your doorbell is properly connected and functioning:
1. For safety purposes, start by turning off the power to the doorbell at the circuit breaker or by switching off the appropriate breaker in your electrical panel.
2. Visually examine the wires that connect your Ring doorbell. Look for any signs of looseness, breakage, or fraying. Damaged wires can cause connectivity issues, so it's essential to identify any problems.
3. Check for loose connections at both ends of the wires. Ensure that the wires are securely fitted and tightly connected to the back of the Ring doorbell as well as the power source.
4. Inspect the wires for any signs of wear and tear, such as cracks or exposed copper. Frayed wires can disrupt the electrical current, leading to malfunctions in the doorbell's performance.
5. If you notice any looseness, breakage, or fraying, it is essential to resolve these issues. Depending on the severity of the problem, you might need to replace the entire wire or simply repair it. Use wire strippers to remove the damaged section and twist the new wire into place.
Regularly inspecting your wired connections is crucial for ensuring that your Ring doorbell functions optimally. By following these steps, you can identify and address any issues promptly, contributing to the longevity and effectiveness of your doorbell system. Remember, always prioritize safety by turning off the power before working with any electrical connections.
To properly examine the wires connected to the doorbell button and chime box, it is crucial to ensure safety by turning off the power at the circuit breaker panel box. Once the power is off, follow these steps to examine the wires:
1. Remove the cover from the chime box: Locate the chime box, usually found near the doorbell button or inside the house. Use a screwdriver or appropriate tool to carefully remove the cover from the chime box, exposing the wiring and components inside.
2. Inspect for any damage: Take a close look at the wires and components inside the chime box. Look for any signs of frayed or damaged wires, loose connections, or burnt marks. If any damage is found, it may require repair or replacement.
3. Inspect the wires connected to the doorbell button: Pay attention to the wires connected to the doorbell button. Ensure they are securely attached and not loose or damaged. Any loose or damaged wires should be reattached or replaced.
4. Ensure proper connection: Verify that the wires are properly connected to their respective terminals on both the doorbell button and the chime box. If there are multiple wires, ensure they are connected to the correct terminals.
5. Check for proper insulation: Confirm that the wires are adequately insulated and not exposed. Exposed wires can lead to electrical hazards and should be covered or replaced with properly insulated wires.
By following these steps, you can effectively examine the wires connected to the doorbell button and chime box, ensuring that they are in good condition and functioning properly. Remember to exercise caution and turn the power back on only after completing the examination and any necessary repairs or replacements.
To address the next heading and check for loose or disconnected wires in your doorbell system, follow these steps:
1. Start by visually inspecting the wires that connect the outdoor push button, wall chime, and transformer. Verify that the wires are properly connected at each point. Look for any loose or detached wires that may be causing the issue.
2. Ensure that the wires are securely plugged into their respective terminals on the push button, wall chime, and transformer. Gently tug on each wire to check for any signs of looseness or lack of proper connection. If you find any loose wires, reconnect them firmly to their respective terminals.
3. Use a multimeter, if available, to further test the connections. Set the multimeter to the continuity or resistance mode. Touch one probe to a wire's terminal at one end and the other probe to the corresponding terminal at the opposite end. A reading on the multimeter screen or an audible sound indicates that there is continuity and the wire is properly connected. Repeat this test for each wire in the doorbell system.
4. If you don't have a multimeter, you can try touching the wires together temporarily to test for sound. Be cautious while doing this and ensure that the wires are not touching any other metal parts or live electrical wires. If you hear the sound of the chime or bell, it confirms that the wires are making a connection.
5. If there is no sound or if you are unsure about any aspect of the inspection, it is recommended to contact a professional electrician. They have the expertise to diagnose the issue accurately and ensure the safe and proper functioning of your doorbell system.
By conducting a thorough visual inspection, using a multimeter or performing a temporary connection test, you can identify and resolve any loose or disconnected wires in your doorbell system, ensuring a properly functioning doorbell.
in your doorbell system.
To reconnect any loose wires securely in your doorbell system, follow these steps:
1. Begin by locating the doorbell transformer. This is usually installed near your electrical panel or in the basement. It is a rectangular or cylindrical box that converts the voltage from your house into a lower voltage suitable for the doorbell system.
2. Once you have found the transformer, turn off the power to the doorbell system by flipping the corresponding circuit breaker in your electrical panel.
3. Next, inspect the doorbell wires for any damage or kinks. Look for any breaks or frays in the wires that may be causing the connection issues.
4. If you find any breaks or frays in the wires, carefully strip the outer insulation from the wire ends using wire strippers. This will expose a small length of bare wire for the reconnection process.
5. Use twist-on connectors to repair the wires. Insert the stripped wire ends into the connector and twist it clockwise until it is tightly secured. This will create a secure connection between the wires, ensuring that they are properly reconnected.
6. Once you have repaired any damaged wires, turn the power back on to the doorbell system by flipping the circuit breaker back to the "on" position.
7. Test your doorbell system to ensure that the wires are securely reconnected. Press the doorbell button and listen for the chime or sound.
8. If the wiring issue is more severe or you are uncomfortable working with electrical components, consider contacting a licensed electrician for a complete replacement or further assistance.
By following these steps, you can easily and securely reconnect any loose wires in your doorbell system. Remember to always prioritize safety and consult a professional if needed.
 Author: David Manual